Sunday, August 7, 2011

Fast and Dirty Pinwheel fun!

I set my kids to making pinwheels.  Just giving them a craft to keep them occupied.  Since I couldn’t find my larger brads they had to make do with the small ones…which meant no attaching pin wheels to straws that day.
With 4 kiddos I can’t supervise each one at the same time, so we didn’t measure, didn’t use a template…quick and dirty was the name of this pinwheel making game.
Supplies:  scissors, paper, brads


The optional supply is the hole punch, you can easily punch brads threw the paper, but I have this ultra-tiny punch so I put it to use.

We used scrapbook paper (12x12) for the big pin wheels.  Gluing two pages wrong sides together gave our pin wheels a bit more character:

Here’s the quick and dirty:

Fold the paper on the diagonal both ways, cut along the diagonal to about a thumb length from the center point,


punch holes (or brads) thought the (same) corners of each “ triangle”,


feed the brads through each hole and through the center point, open the prongs....


TADA!  You have a pin wheel!

After making a few Missy M decided we needed to make some smaller ones.  For these I just cut the scrapbook paper into quarters and let them go at it.  Some of my “fancy” paper scissors came out and the kids made pinwheels with scalloped and zig-zaged edges. 

We gave each child who attended the “cake 1” get together a chocolate wrapped in scrapbook paper with a pin wheel on top.  I think they turned out cute!


I haven’t been doing much sewing lately, but I do have a number of projects in the works!  Right now I’m enjoying the sunshine in the Seattle area, but the next rainy day will find me back in my sewing room working on back to school fashions and a fabulous (I hope) new leather bag!

Tuesday, August 2, 2011

The Cakes

We celebrated Missy M’s 11th birthday last week…with cake number 1:


And cake number 2:

And at some point we’ll have a third cake when we have her school friends over for a party.
I’ll be officially caked out by then.

My mom is with us this summer and it's been great!  She made both cakes.  the first was a quick, recipe right out of her head kind of cake....and it was really good!

For me to replicate cake 1, I probably wouldn't go from scratch like she did.  I'm not that talented in the kitchen! Instead I'd...
  • buy a pre made angle food cake
  • rip it apart into tiny chunks
  • slice up some strawberries
  • mix it all together with some (pre made) vanilla pudding 
  • Press it into a mold (in my case just a 13x9  glass Pyrex pan) and leave it overnight in the fridge
  • The next day, flip it out of the mold onto a plate/cutting board/cake board and whip up some heavy whipping cream to frost
  • Decorate with strawberries and refrigerate until party time.
Lucky for Missy M that I wasn't making it.

Cake 2 came from my McCall's cooking school binder of recipes...no longer published but if you can get your hands on one I strongly recommended  it! I've never has a recipe go wrong and everything I've ever made has turned out perfectly!


Now I've got to figure out the next cake and the details of her party...and if I figure it out soon I can get out of baking that cake too!


Tuesday, July 19, 2011

Hula Hoop Weaving

Browsing though Pintrest I found a link to hula hoop weaving--fun!  But I just donated a bunch of t-shirts and didn't feel like cutting up my knits to try this out....

Which brings me to my big roll of cow fabric.  I picked it up for free a few years back, someone (or some company) cut about 4 inches off the edge of a few million yards of fabric.  I kid you not!  There's a whole lot of this (I have 2 spools full plus a couple dozen rolls of it hanging around).  It's perfect for this project!


hoop, fabric, scissors--all you need to get started!
I started by cutting strips long enough to go from one side of the hoop to the other then just tied them around the hoop:


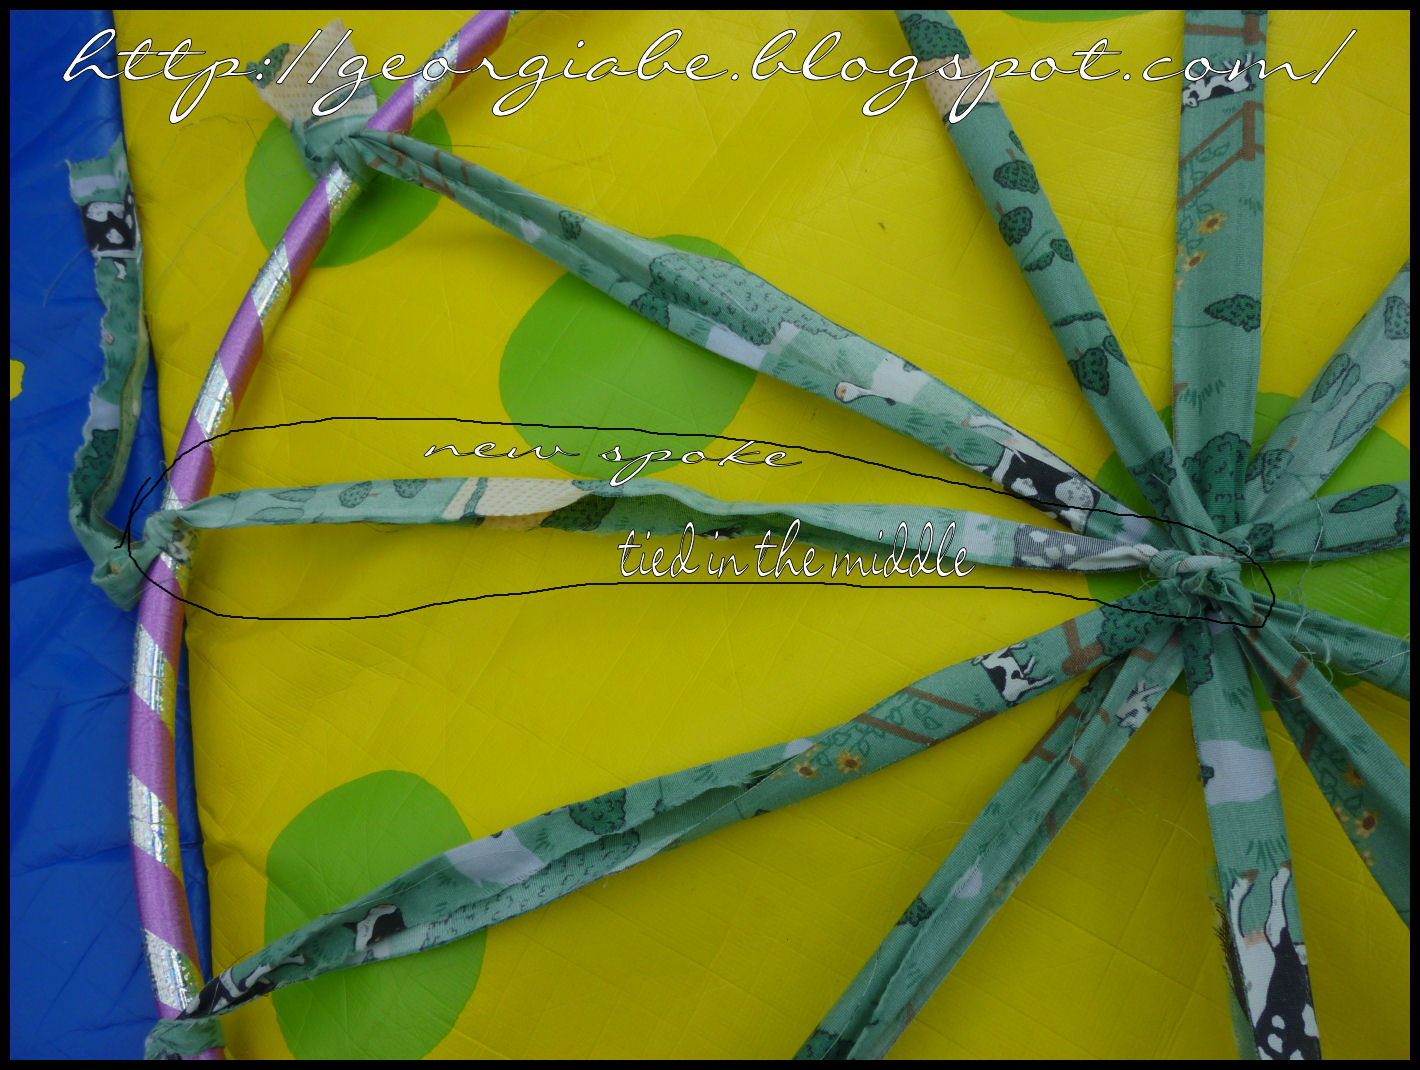
OOPS!  I realized needed an ODD number of spokes...I ended up cutting a strip in half, tying it to the middle and then to the hoop:


We have a couple of different sized hoops, so all the kids got to do one...over under over under was the mantra of the day:


Don't forget to pull it in tight!  Wouldn't a small weave like this make a nice rossette?


Not too tight...or you end up with a basket as my oldest discovered.  Which is kind of cool too.


The kids had fun, I had fun, lots of cow fabric got used up and I thought about a couple more crafts to do with the kiddos using this type of circle weaving technique. 

Can't ask for much more than that!

Tuesday, July 12, 2011

How I Use Button Hole Elastic

Button hole elastic, greatest invention ever!  (or pretty dang close to it!)

If you’ve purchased kids clothing in the past few years you may be familiar with the adjustable elastic found in many of the waist bands.  Maternity clothes?  It’s used there too—I assume it still is. It is elastic that has button holes woven through the middle for the whole length of the elastic.

For me: a great discovery!  I have the skinniest boy ever (go ahead; dispute this—I’ll still claim the kid has too many ribs showing).  Lucky child got blessed with a really fast metabolism, and pants that don’t fit.  Even the ultra-slims are too big around the waist.

Now I have a fix for that!

I’m showcasing a pair of jeans which are just a bit too big for Mr.A (they don’t stay up with a belt, so this is my last ditch effort to find a fix—I know my trusty button-hole will work!)


You’ll need two buttons and a length of button hole elastic…and the usual basics: scissors, needle & thread and something to thread the elastic through the waist (I use a safety pin).


First find the inner side seams of the jeans. Carefully cut a slit in the inside layer of the waistband 2.5 to 3 inches from the seam, towards the front of the jeans. Repeat on the other side


You have the option of hand sewing a blanket stitch around the opening you just cut.  For kids clothing I don’t do this anymore…actually anything which will be out grown or I’ll shrink out of quickly I don’t bother.  Your cut should look something like this:


I do a quick measure of elastic, which I cut about the same length as the length between the slits.

Sew each button on the inside in front of the waist band (I like to place the button about an inch away from the slits), then thread the elastic through (I use a large safety pin for this).


Look!  Pants that stay up!


I use the same technique on jeans which are a bit too loose on me, just so I can wear them a bit longer until I get in the next size down comfortably. :)

If you decide to use button hole elastic when sewing from scratch, make sure the waistband is wide enough for the elastic to go through, and use your sewing machine to sew buttonholes on the inside sides of the waistband.  This is a great way to be sure a handmade item of clothing “fits” around a waist—especially when that item is a gift!

Tuesday, July 5, 2011

Duckie Earings

I have a thing for duckies, of the rubber variety.  So I just had to make earrings out of these beads:


Are they not adorable??  Glass duckie beads--perfect summer fun earrings!

The day I made them we were working on putting up our pool--a yearly task that's made us consider more than once to put in a permanent one!  When I pulled out our duckie water thermometer I couldn't help but take these:


Notice the crazy temp: 103F?  Really?  No, it's the pacific north west, I've yet to see it that hot!  The thermometer was sitting in a dark plastic box, and we did have a sunny day (high 70s).

In the end I parted with these duckie earrings--we gave them to a friend along with these:


I do hope she liked them!  Now I'm off to make a pair or me and enjoy the Seattle sun shine!


Monday, July 4, 2011

4th of July Style!

Back in the days before blogging I think I made a million little girl dresses. 

OK, maybe just half a million. 

The point is I made so many, I've forgotten what I stashed away for my two youngest girls.  So I was thrilled when I pulled this out just in time for the 4th of July!


The dress was made for a heart themed contest...but being me I sent in my entry last minute and it didn't make it in time.  Ah well.

The hearts are all paper pierced with patriotic fabrics, each one a bit different:


Check out the lining:


And the top pocket:


I had such a fun time making this dress! And it will be worn by my younger girls for at least the next 4 years (it's a bit big on the 5 yr old right now, and the 3yr old has a couple of years before it will fit her)....now to find out what other treasures I've stashed away...

Have a Happy 4th everyone!!