I'm still recovering from a year of sick. Trying hard to let go of the anxiety of missed opportunities, and the disappointment of not being able to go into business for myself as I had planned at the beginning of the year. I'm trying to reconnect with my love of sewing and creating.
I've been intrigued by all the mug rugs I've seen in quilting and embroidery forums.
I've also been wondering what to do with some of my purchased embroidery designs.
So naturally I put the two together! The base designs come from http://www.emblibrary.com/. I've played with them a bit--adding some quilting and resizing in Embird. The result:
These were a fun project! They have even inspired me to digitize a number of my own mug rug designs....which will be fun stocking stuffers this year!
I love to sew bags! And with my kiddos always asking me to make them something, I thought a great in-the-hoop bag would be easy for THEM to make. This pattern from http://www.embroiderygarden.com/shop/ is so simple that my oldest has made a number of them for herself and for her friends!
This was a last minute homecoming bag (so last minute we struggled to find a zipper)
This one she made for a friend:
I've really been getting back into the machine embroidery, and trying to get back to blogging! Stay tuned for more projects!
My oldest child loves fingerless gloves. She also loves Dr. Who.
And I'm a mom who likes to see her children happy.
I just couldn't resist making her these! It's an in-the-hoop machine embroidery design I came up with. I love to challenge myself to make fun designs my kids will enjoy! These are a hit with all 4!
UGH--the health thing! Living with autoimmune issues can be the pits! One day up, next day down. This week I had a bit of a set back--the kind that put me in the ER for a day! I'm getting better and pushing through, but being there did put some things in perspective.
I love to create! The finished product makes me happy and has never disappointed recipients (well, maybe that one blanket I didn't quilt because at the last minute I decided to let a friend decide if it was heavy enough or if she wanted it heavier....the baby is not a baby anymore so I guess I'm off the hook!)
I love to hand embroidery, cross stitch and needlepoint--always a great and easy on the go project for me.
I love to machine embroider, and with that create designs. I've been at it for a long time now and digitizing is something I have fun doing....but selling the designs and dealing with all the headaches that come with that...ugh and double ugh!
Lying in that ER bed just made me realize I've spread myself to thin with all my ideas and projects. As I looked at everything I've started I decided that developing the digital shop will have to be put on hold for now (and maybe forever).
That doesn't mean I won't put designs out there--oh no, there will be all kinds of free stuff! It just won't be my focus.
Instead I'll focus on the final products, cleaning up tutorials for this blog, sharing my love of needle, thread and fabric...and just having fun!
Because life is too short, and throws us too many curves--we should love one another and share our crafting love while we can.
I've been making the non-in-the-hoop version for a few years now--and yes, they are based off the silhouette of a popular chocolate bunny. My favorite as a matter of fact....unfortunately due to allergies and autoimmune reaction I can't eat chocolate anymore.** :(
Last year I made them in the hoop for the first time (that is the embroidery machine did most of the work). When I started stitching them this year again, I reached out to a fellow machine embroidery enthusiast at my church and said "let's make these for our Easter egg hunt!" She was totally on board and we had a great time stitching stuffing these little cuties!
I love to create! Making people smile with my creations is such a huge added bonus!
Hope this little cutie brings a smile to your face and your heart!
*free bunny does not contain my church logo! Feel free to make your own, design it, own it and have fun! :)
**although I have found out I tolerate most of the Theo dark chocolates fairly well. :)
I have been mad stitching bunny bows! For a non-bow person it's been a strange twist. For a non-bunny person (especially those that invade my garden every year) it's even stranger!
But how could I resist these cuties?
When my girls saw them, they fell in love. One thing led to another and I started offering them up for sale on my other Facebook page (and soon to be web site), Dolls and Doodles. Which is brings up another point: they are not my design. That in itself is strange because I don't think I've bought many embroidery files from indie designers. These are from Bobbin for Appliques.
Of course everyone in my household has been bow making with me--very sweet and not complaining at all about the little bits of felt everywhere! I love my family and how supportive they have been as I try to get my business off the ground.
But it will take a bit of time to train them that mommy can't drop certain projects to work on theirs.
So when my oldest asked for a Tardis bow, I first asked if there was one available. I mean, I'm cleaning up 12 years worth of digitized designs do I really want to digitize one?? And have I mentioned bows are not my thing??
Oh, and she wants it for Thursday. (aaakkkk!!)
Between the work I HAVE to do, the doctors appointments I CAN NOT miss and the head cold that is still plaguing me (4 weeks and counting).....and no readily available design????
Yeah, I love my kiddos but I just can't do it all. Still, I tell her to design one and I'll see what I can do.
She totally thought it out, and I'll admit I got a bit excited about trying to make it happen.
I have to give credit to all the internet sites that show how to make felt bows (so many of them!) for helping me figure out the correct shape to digitize to make these!
Of course, if there was a bow to purchase in time, this little project would have waited in line behind all the others. But it was fun to design with my kiddo, and it will be another great memory for us both!
The idea was that I would sell these as finished products, I didn't think for a moment to offer up the embroidery file for purchase!
She is one happy camper. Ready to wear her big Tardis bow, show off her mom's work and claim designer status.
Me--I just hope the bows are well received and people have fun with them. I'm still not a bow girl, but I'm enjoying the fun my kids are having with them.
After years of digitizing my own designs...of talking about
selling them...dreaming about opening my own little online shop, I've finally
stated to take steps towards making my dream a reality!!
I've been digitizing for close to 12 years now.I've read too many books to name, taken too
many classes to sharpen my skill...and stitched out too many tests, toys and
t-shirts to think about!Some I've
shared here on the blog, and others I've kept as closely guarded secrets.
Now I'm about to find out if all the learning/practice/ideas
can translate in this SAHM's little business dreams. Excited, nervous and scared out of my mind—just some of what
I am feeling these days!
As I launch my digital downloads of patterns and machine embroidery on my GeorgiaBE etsy shop, I’m
also starting to sell my creations.I’ve
mentioned my dolls before but have never really blogged about them.Since I was in middle school I’ve been making
dolls (before that if we count yarn dolls!), but it’s only been the last five
years that I’ve REALLY been making dolls.Most are from my own patterns, many have evolved over time to include
machine embroidery…so Dolls and Doodles is born!Currently I am only on Facebook (you will be
redirected from Dollsanddoodles.com), as I develop the site and the etsy store.
Since my brain surgery in 2009, I’ve been incredibly blessed
by the people around me.That event made
me realize how many wonderful people the Lord has placed in my life.They rallied around me while I recovered,
they encouraged me when I shared my creations with them and they blessed me
with honesty and support when I shared my business ideas with them.
I’m still scared as I move forward, but knowing that there
is a virtual hug and a real one out there for me makes all the difference in
the world!
Thank you all for sticking by me (and my blog)—I hope you’ll
enjoy the next part of my journey in life and in the cloud!
I’ve had this magnetic board from Ikea for a few years. We kept moving it form one storage spot to another until it finally ended up in the kids playroom…along with the hundreds of magnets that once graced my fridge!
Oh sure, some magnets make it back the fridge, but overall they tend to stay here…in the playroom…on the board.
(Makes for a happy mommy who no longer knocks magnets off the fridge, all over her kitchen floor, creating stepping hazards as she rushes to feed four hungry kids at any given hour of the day.)
If I haven't mentioned all the pregnant friends around me....don't worry I will! I've sewn more baby gifts in the last year than I did when I was having my own kids!
I do love my friends who can joke about their pregnancies....
Didn't think up the saying myself, but I did digitize and stitch it!
Lesson learned from this latest jean apron: be careful when embroidering over a seam! I broke a few needles, but the end result was worth it!
I can't help myself--whenever I want instant sewing gratification I make one!
Then I people started asking me to make them....
For our Church Nursery Workers
Love this pocket! Had so much fun thinking it up!
Then there was a 4th of July hostess gift, a bit of a change for this one:
And when my youngest girlies has their last birthday party, I made some more!
Heart pocket for the Birthday girl, the middle is a "sibling" extra just made with ribbon straps and serged edges
I made 10 of these from old kid jeans--they were a hit! At the last minute I got a call asking if a sibling could come, so I whipped up an "extra" using ribbon from my stash as straps.
And you'd think I'd be bored of these by now...think again...
The first time I heard about an apron made from a pair of jeans, it was from one of my playground mommies. Aimee told me how she did it, and I promptly filed it in my "to do" mental sewing file...and then promptly forgot all about it (that's typical of me).
Then everywhere I looked I saw these types of aprons being featured! Given how many tutorials are out there to make jean leg aprons, I won't attempt to write my own. :)
Instead let me share (and maybe inspire you to make one yourself)...
The first is my prototype: ruffles all around...
Not too exciting...but I did learn a few things.
those ruffles at the top don't stay up unless attached to the straps
if you cut the legs off too close to the crotch, you may have some "wave" in the bottom of your apron no amount of ironing can fix.
The next one I didn't cut along a seam, instead I cut it right down the middle front of the leg. This type of cut seems to give the apron a "curvier" shape.
It just seemed so plain so I ended up adding a heart pocket.
Then I got adventurous with the ruffles again: top ruffle facing down (why didn't I think of that the first time around??)
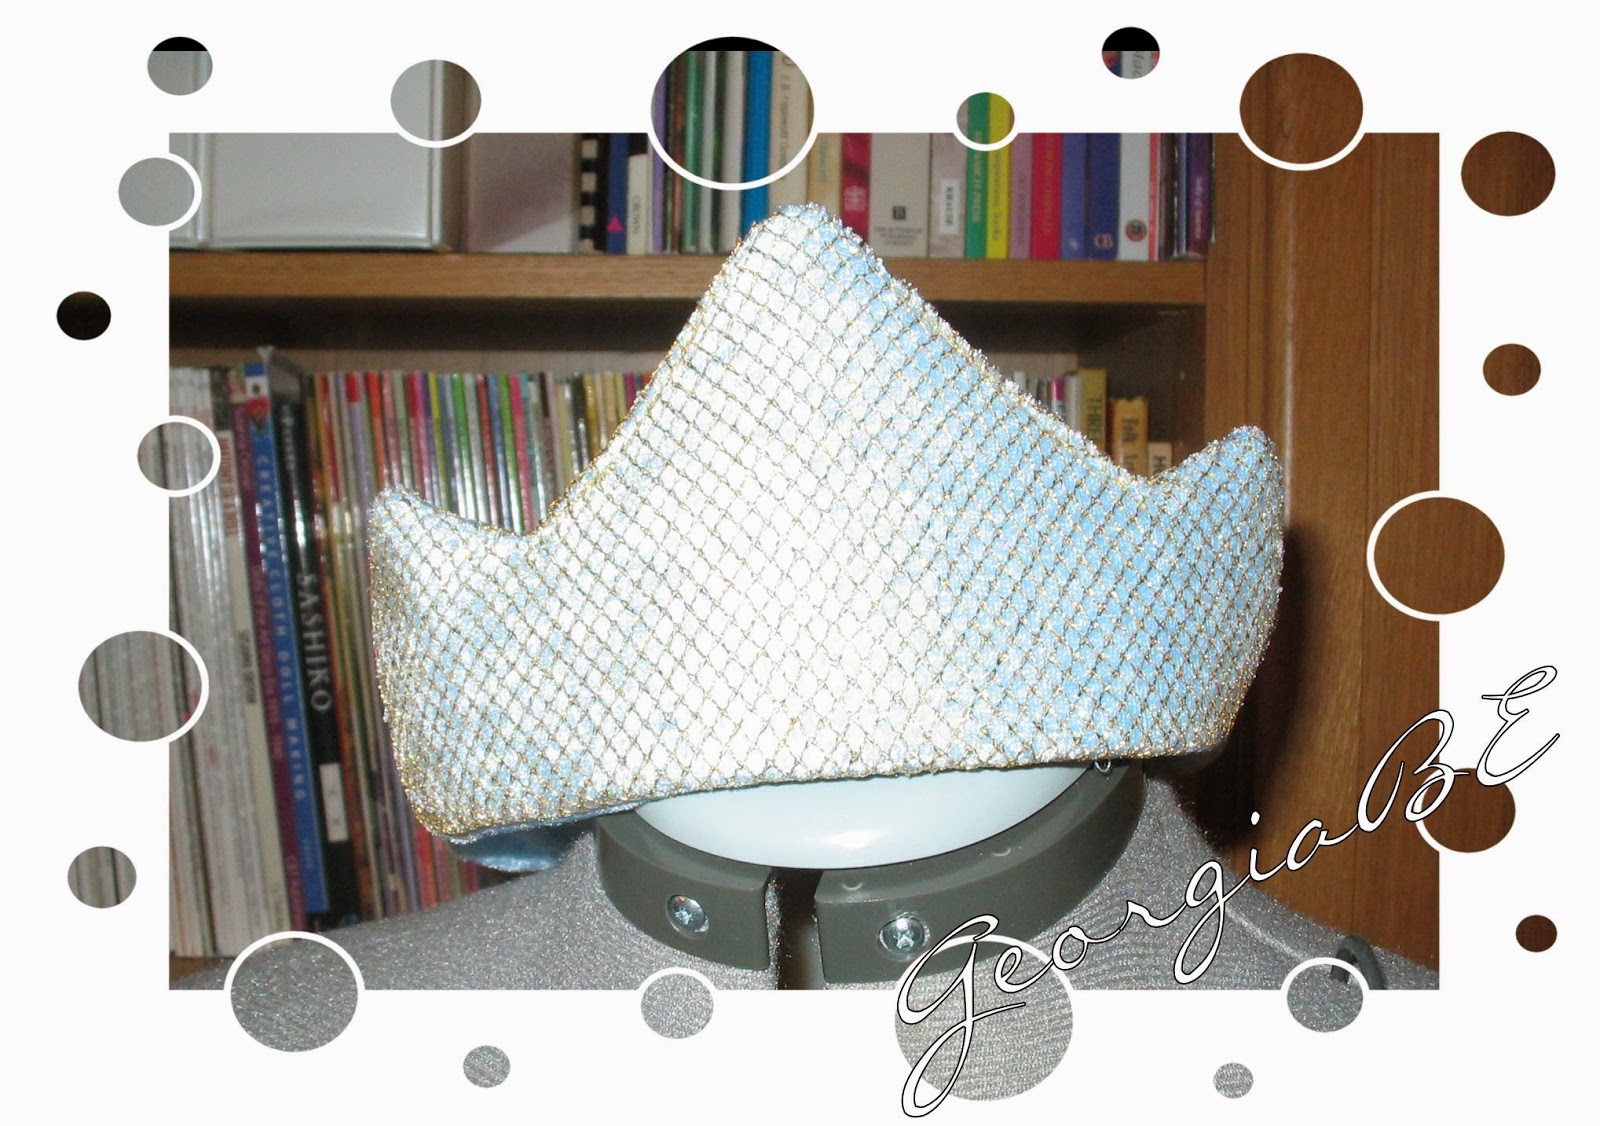
A long, long time ago I showed you the crowns I made....my girlies are still playing with them today and when friends come over the crowns are always a hit!
Here's how I made them:
First you'll need to cut out your shape. I kept my shape simple and used Peltex Pellon, but I'm sure you could use anything that will hold it's shape. This part will be sandwiched between fabric and won't be seen:
Choose your fabric--I used a stretch pink costume fabric and some gold mesh.
You could use only one fabric--just make sure the right sides are together of your two layers and your crown is pinned on top.
For mine I have 4 layers of fabric. The gold mesh is in the middle sandwiched by the right sides of the pink, my Peltex crown on the top, pins through all layers:
Sew--I used a straight stitch, nothing fancy about a 1/4 inch away from the edge of my crown.
Be sure to leave the bottom open, that's where you'll be turning the fabric to the right side.
Trim the excess fabric. Open the bottom and flip your fabric to the right side...your crown will look something like this:
Since I used stretchy fabric (the pink) I didn't need an elastic, but it would be simple to do . I cut a rectangle long enough to fit around the head, about 1.5 inches wide, made a tube out of it (sort of like a fabric head band--you could run an elastic through it if needed) attached the crown and had some very happy princesses!
I'm thinking about gifts...and all the sewn gifts I've given...and all the pictures of said gifts I never thought to take.
One of my big projects this year has been organizing my family photos. Digitizing all the photos we took prior to digital cameras has been a huge task--but totally rewarding! I now have those pictures as screen savers on every computer in my house. I can sit and watch them for hours!
In the process I started collecting all the craft related pictures and realized how few I have from the years I first started sewing.
I did find this:
I've made 3 and 1/2 quilts in my sewing life so far, and this is the one that made me realize quilting isn't for me. I machine pieced and quilted it myself (this was quilt #2, the first was just a bunch of squares put together and quilted by tying), broke a whole lot of needles and spent more time freaking out about it than I should have. In the end it turned out beautiful and the recipient was very happy with their gift.
Yes, I learned that quilting, piecing all those little bits of fabric isn't my thing. So the 1/2 quilt sits in my UFO (unfinished objects) pile waiting for the day I feel brave enough to tackle it...today is definitely not that day!
Whenever I come up with a new birthday craft idea I don't stop smiling for days! Never mind the agony that goes into thinking up those ideas!
It's totally my fault I'm in the position of having "fabric" type crafts at parties.
If I hadn't thrown some elaborately crafty birthday parties for my older kids, the younger would never have heard stories/seen pictures and I'd be free to skip a step...instead the planning starts months before.
I noticed all the elementary school kids seem to like backpack charms, that was what I went with for with the last girlie party. They were a hit!
I sat at the computer for a while before I came up with the cupcake and owl designs, but once they were digitized my embroidery machine did the rest (with a few thread changes on my part).
The girls at the party used fabric markers to decorate their charms. The party happened in the last school year, but I still see these little charms decorating backpacks!
As an added bonus, I made extras for me to use as gift tags!
Yesterday's show and tell was a cupcake charm which I just had to make for this adorable cupcake tote!
Isn't it FUN! I agonized over this bag--from design to fabric choices. In the end I chose the first fabrics I thought of, drafted the pattern myself tweaking it as I sewed.
I couldn't be happier with how it turned out! Hot fix crystals are the "sprinkles on top and of course the little added bonus: charms!
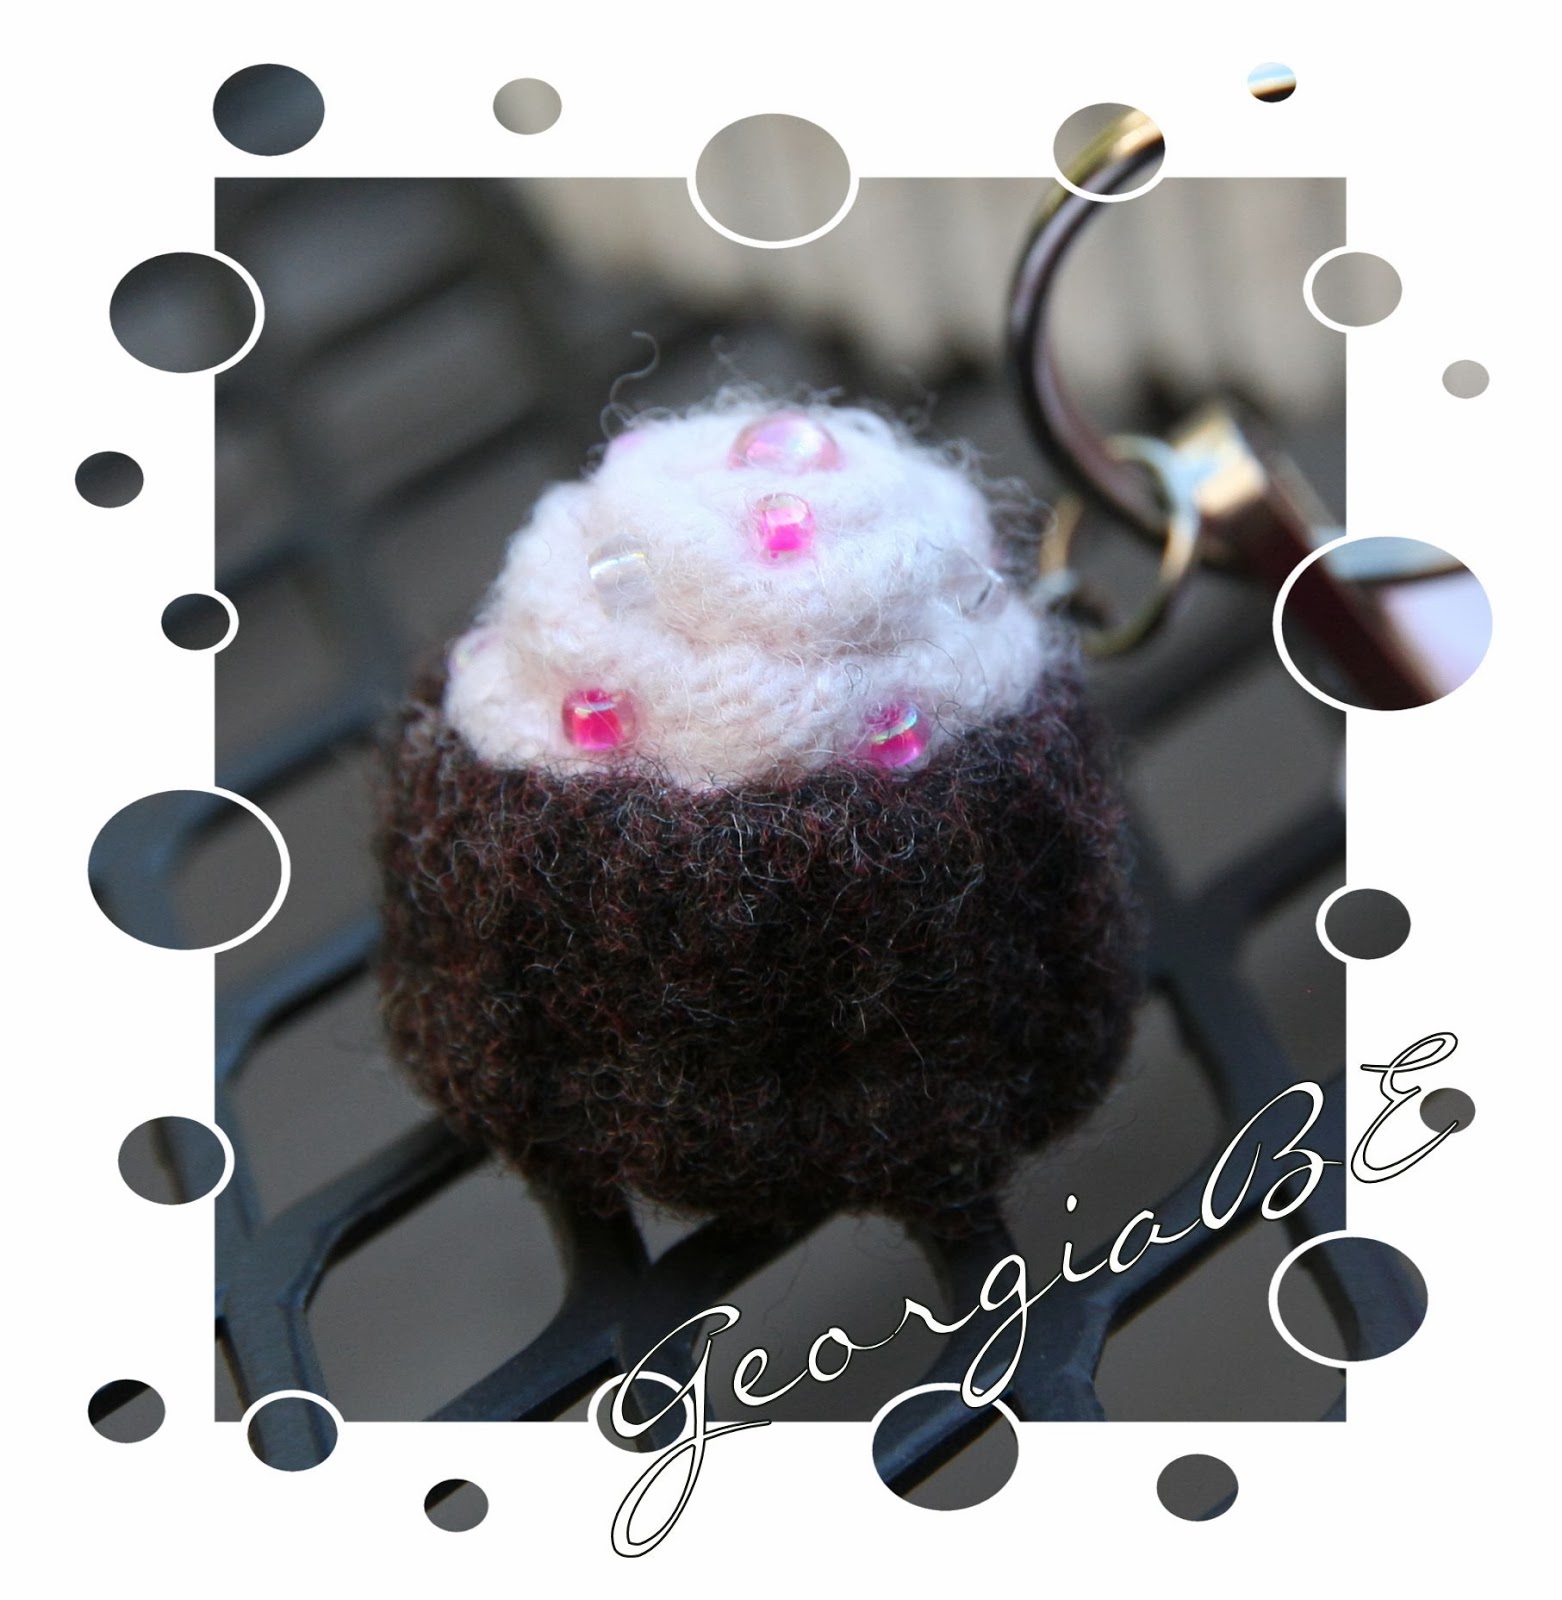
Is it any wonder that I beg friends and strangers for the wool sweaters they are ready to discard when you can make such cuties with them?
I've made these before, bigger versions, and shared them in the post: Cupcakes anyone?
Fun, easy and cute! Don't sew? You can use glue! As long as you can cut rectangles and circles out of felted wool sweaters (those would be wool sweaters you shrink) you're in business!
This little cutie was made of smaller scraps of felted wool with some added glass beads for sparkle...turned into a key chain for a fun addition to a cupcake bag I designed and made.
Just when I think I'm over the cupcake craze, my crazy brain thinks up another cupcake project to do!
For a brief period of time (a lifetime ago) I was a math
major.That isn’t saying much considering
that I was also a kinesiology, psychology, computer science, business, English,
sociology, and economics major during my stint in university.
At the end of year four I figured it was time to get on with
my life, so I sat down counted how many credits I needed in each discipline,
looked at what was offered that summer and graduated (to my parents relief!)
with a degree in economics and sociology.
Considering I left high school with plans to pursue a
journalism and teaching degree, the path didn’t lead me there.I didn’t even put much of my university
degree to work in my marketing career (way back in the time before cross
country moves and kids)!
I’ve used all the knowledge I’ve gathered, bits and pieces,throughout my 40 something years of life. And I continue to surprise myself how many of the concepts I've retained from math/science I use in my craft/sewing projects!
My mom (who is awesome!) encouraged me in each and every discipline
I studied.She let me explore just about
every interest I had growing up.Sharing
bits of her knowledge and experience along the way.I’m now in her shoes:
encouraging my kids in finding their passions, sharing bits
of my knowledge and experience along the way.
Yes, my kids sometimes fall into the stereotypical roles
of play commercials would have us believe, but at the end of the day their
imaginations take over and new worlds of play open.I encourage that.
So I am intrigued and impressed by Goldieblox toys—pairing a
story with a building kit?GENIUS! (yes
in a sing songy voice!)
It’s a concept which would work great with boy or girl toys
(currently they are marketing to girls).Imaginations will take over, but at least the story gives kids a start, a place to begin exploring. A seed to let their imaginations grow.
(I'm not affiliated, don't own the product...yet...not being paid to share....but I think the idea is worth sharing with everyone. It's also a reminder to my crafty crew out there who sometimes forgets how much math and science we use in every creation we make--those seeds stuck even if the definition of Pythagorean theorem didn't!)
After trying hula hoop weaving I went on a bit of a weaving
binge. Anything circular was fair game to attempt weaving on!
I think I've settled on my favorite--a notched CD.
It's easy, portable and I love the rosette like flowers--perfect for accessorizing sewing projects or gifts!
I just used ordinary scissors to make the notches—make sure
you make an uneven number!I made 7 in
total.
I used torn denim as my fabric...
Wrap fabric strips around the CD like you would on the hula hoop, but your last spoke will go through the middle hole and be tied off on the underside (the side you don't weave on).
You're set to start weaving!
When your rosette is the size you want, turn the CD around and cut the denim spokes close to your knot, the knot will come through the middle and....
....you'll be left with a leggy looking spider flower (according to my kids)! I wove those “legs” through the back and towards the middle using a large eyed
needle.
I LOVE the way this experiment turned out!Each woven circle is a unique flower!